Intro
It’s great to have you here, let’s beat the rant hacky thingy of deploying, and in this guide we will be deploying to different chains, the layer 1 and also two for layer 2 - that is zksync and lisk sepolia networks.
What do you mean by layers?
Well, there are a lot of reasons that come in with deploying with these layers, and one of the major reasons why we choose to deploy our contracts on layer two protocols are - saving on costs, and at some point, in the case where you’re building larger and complex application you’d need to scale your applications and ensure you’re app is scalable and secure. To learn more about that, I would recommend you do your thing - DYR ~ ‘do your research’.
Prerequisites
All you need is energy, take a drink and let’s get started.
Note: The full code will be at the end of the section if you need to follow along with this guide, but it is not necessary. All the best. All the private keys that you can see are all for testing, you wont find any real money there :), and that being said, let's get along.
Deploying to a local blockchain - anvil
One of the greatest ways you could learn as a developer, the second better option I see for most of the dev, is do the ‘ --help’.
Help
forge --help to learn more about forge.
Deploying using anvil
run -> anvil . You will see a lot of info, and here you can get some of the key things you’ll need when you run your deployment command eg rpc-url, private keys.
then -> forge create src/SimpleStorage.sol:SimpleStorage --interactive --rpc-url http://127.0.0.1:8545
command
forge create src/SimpleStorage.sol:SimpleStorage --interactive --rpc-url http://127.0.0.1:8545 --private-key <paste private key here>
Deploying using the script
Create a script for deploying the contract, in the script folder and include your code eg.
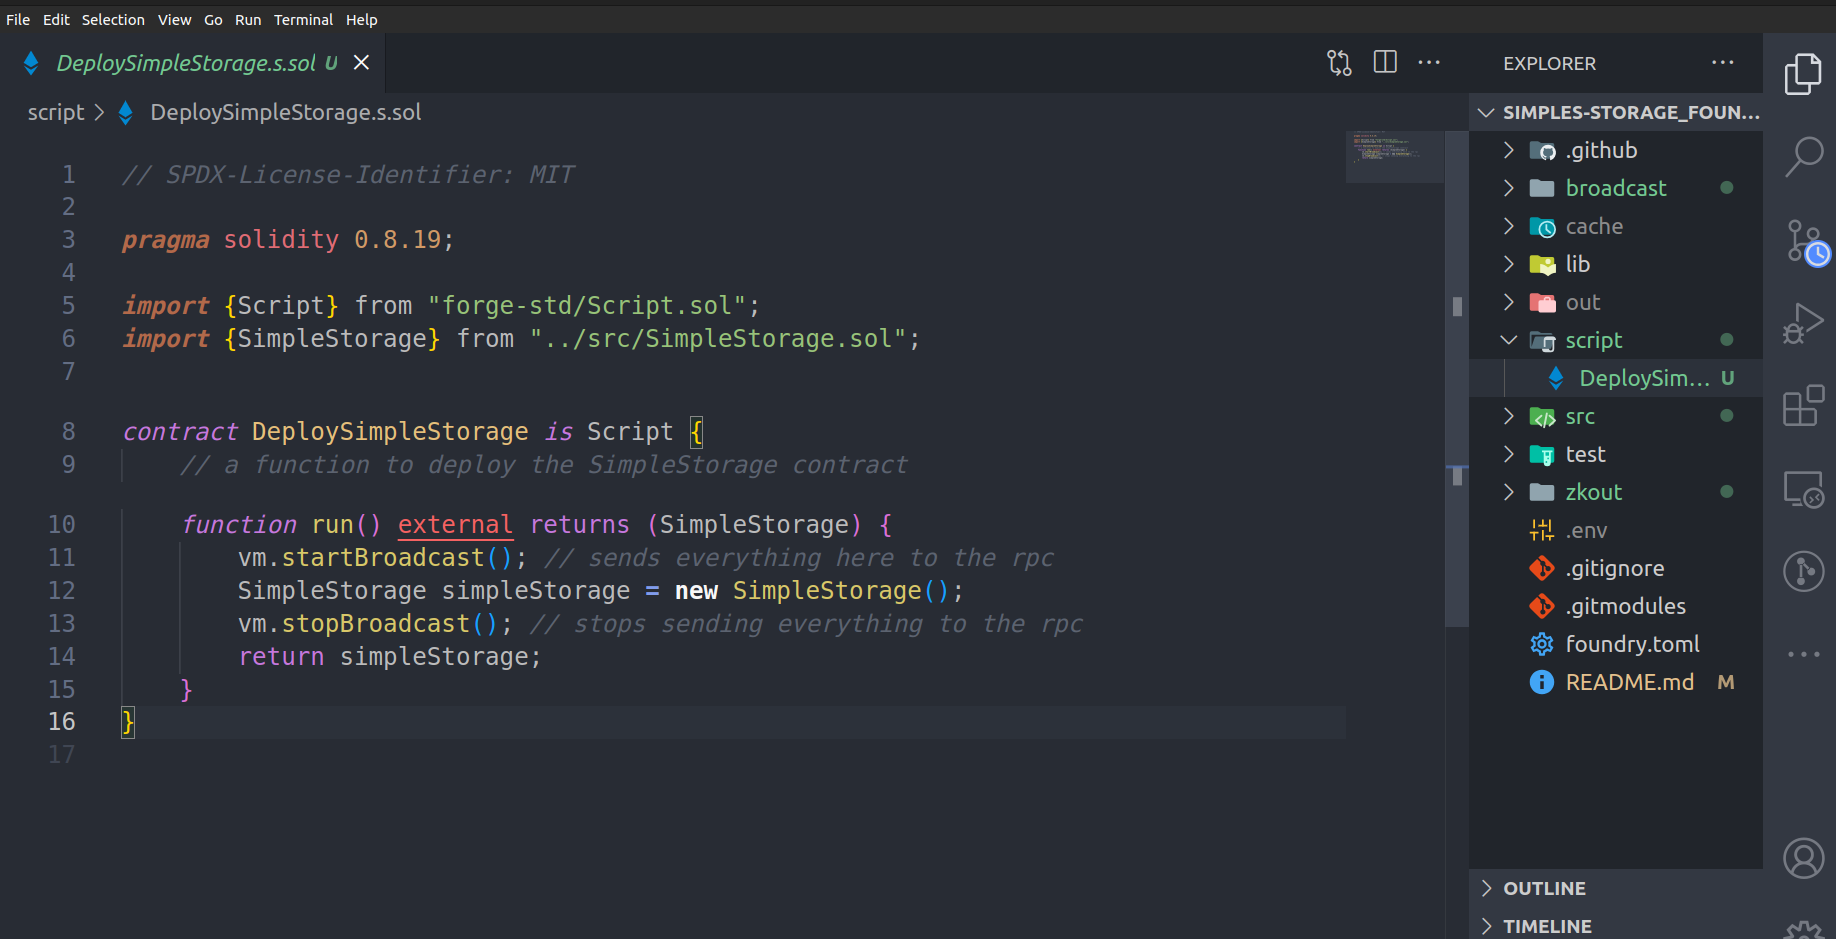
I won't explain much of the code here, but feel free to google them and learn more from the docs.
The command
forge script script/DeploySimpleStorage.s.sol
This will spin up and run in the temporary anvil rpc url.
The on-chain execution
forge script script/DeploySimpleStorage.s.sol --rpc-url http://127.0.0.1:8545 --broadcast --private-key 0xac0974bec39a17e36ba4a6b4d238ff944bacb478cbed5efcae784d7bf4f2ff80
Trick
Converting gas x value to decimal place, using cast
cast --to-base 0x714d1 dec
For more, run cast --help
Interacting with our smart contract in the command line
When creating and adding your secret keys in the local variables, you can have it in there and run source .env to put it in the shell. And to access it this way in the commandline $PRIVATE_KEY and to check if it is there run echo $PRIVATE_KEY . Although this may not be the recommended way, we will discuss a much better approach later in the guide.
Now that we’ve stored it this way, we can replace our commands up there in this format:
forge script script/DeploySimpleStorage.s.sol --rpc-url $RPC_URL --broadcast --private-key $PRIVATE_KEY
You shouldn't run production code with a .env file. Let’s do it in a more secure way now. You can always use the --interactive or a keystore file with a password once foundry adds that.
The better way
Another one? Oh yeah! We don't need to write our private keys in plain text again, and have .env files ever in our projects, for security purposes.
Reasons?
We might accidentally push this on github, etc. We must secure our app and avoid any vulnarabilities that we may cause, and we might loose billion of dollars while working on large dependable applications.
ERC-2335: BLS12-381 Keystore
I’ll leave you with this docs to learn more about it, but for us I will show you how we can do it on a general point, and rest assured to learn more about it here:
A JSON format for the storage and interchange of BLS12-381 private keys.
To set your private keys you would need to run:
cast wallet import defaultKey --interactive
and paste the keys. After that, you would be prompted to enter a password (very important to remember - we will use this in a few), and this is the one you’d really need to remember when you need to access it.
You will have something like this in the end;

To check, you can run:
cast wallet list.
We can now run this command to deploy, with our new changes:
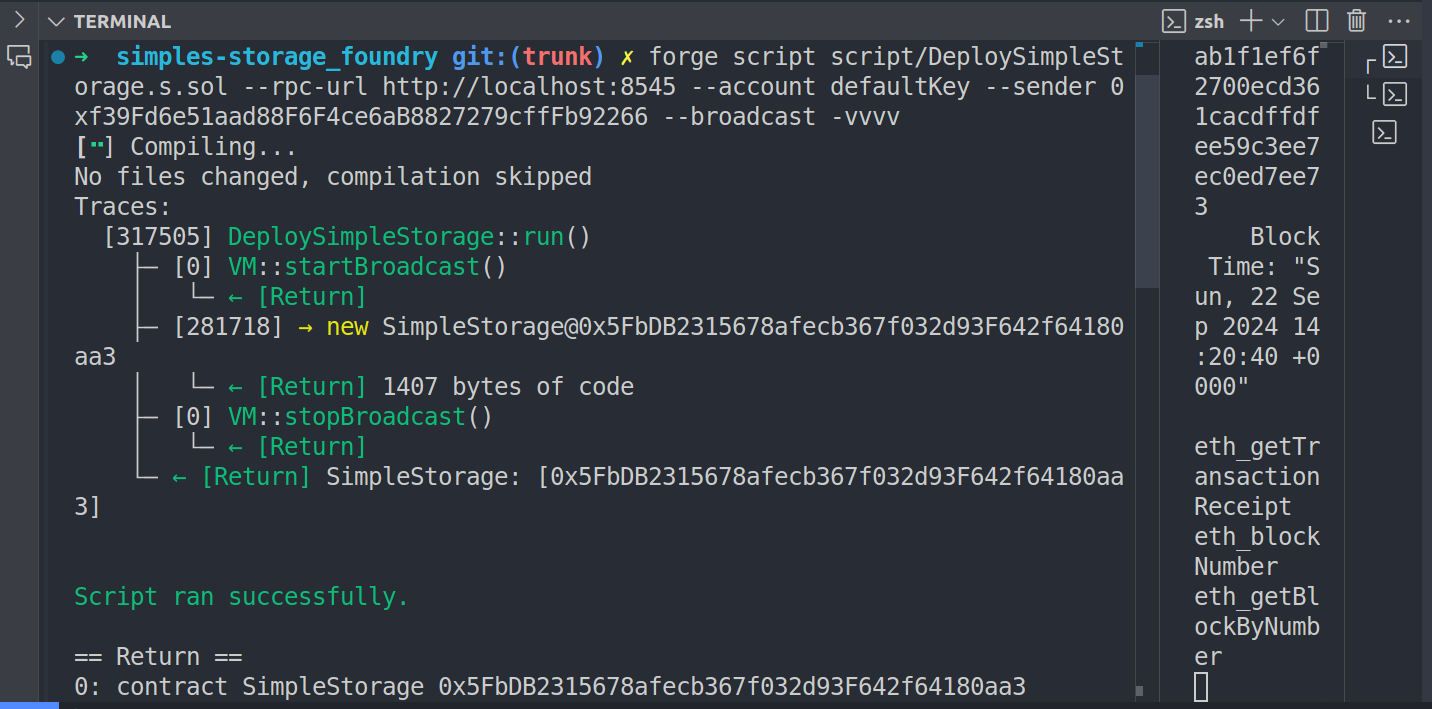
forge script script/DeploySimpleStorage.s.sol --rpc-url http://localhost:8545 --account defaultKey --sender 0xf39Fd6e51aad88F6F4ce6aB8827279cffFb92266 --broadcast -vvvv
Note that the rpc url can be anything, you can have sepolia, mainnet, etc. Notice the other thing we have added is the address of the sender - this sender would be the one associated with the private key.
Here is the snip:
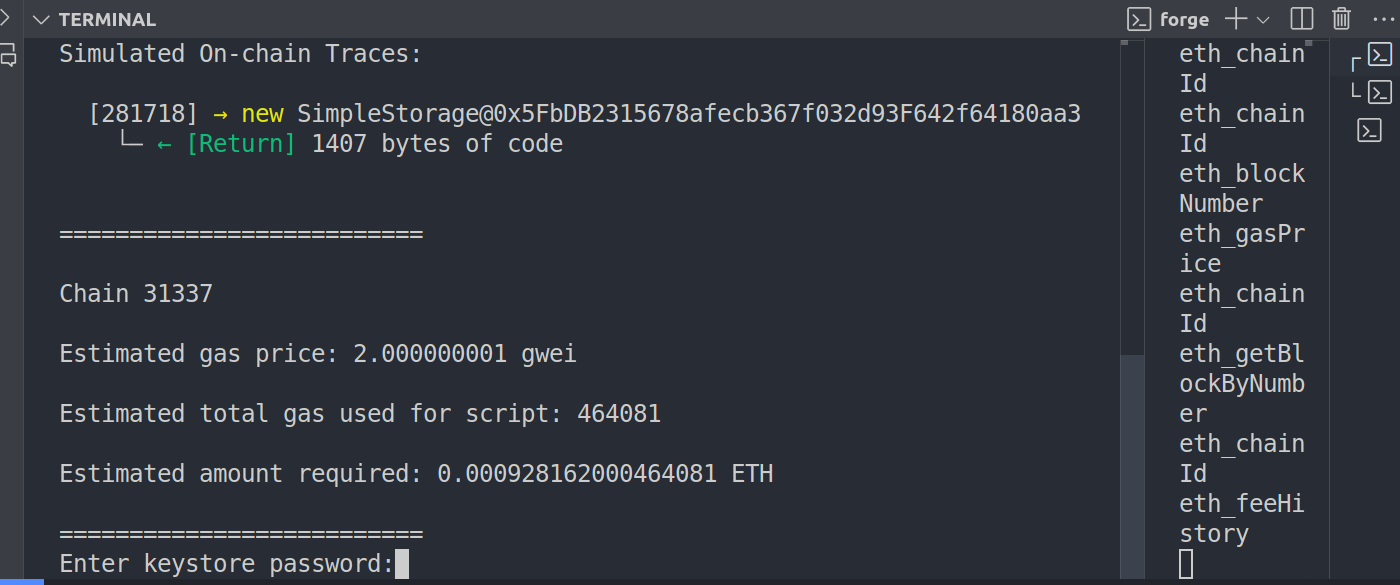
You can input the password you gave earlier. And if you do it well, everything will run fine.
Interacting with our contract in the command line
We can use cast, for more cast --help. Let’s pick our contract address, you can find it in the terminal, after deploying successfully.
We would be using send.
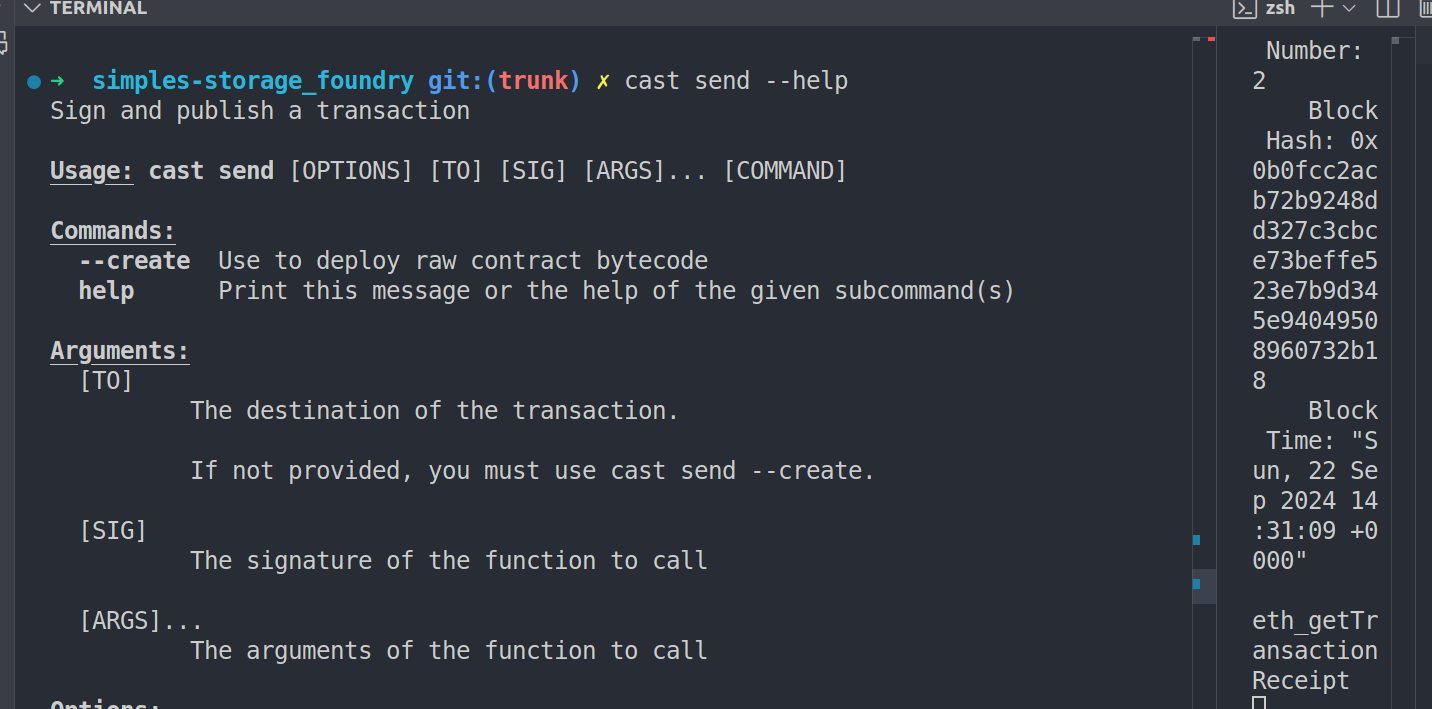
Let’s say we’re calling the store function, we would do something like this:
cast send 0x9fE46736679d2D9a65F0992F2272dE9f3c7fa6e0 "store(uint256)" 123 --rpc-url $RPC_URL --private-key $PRIVATE_KEY
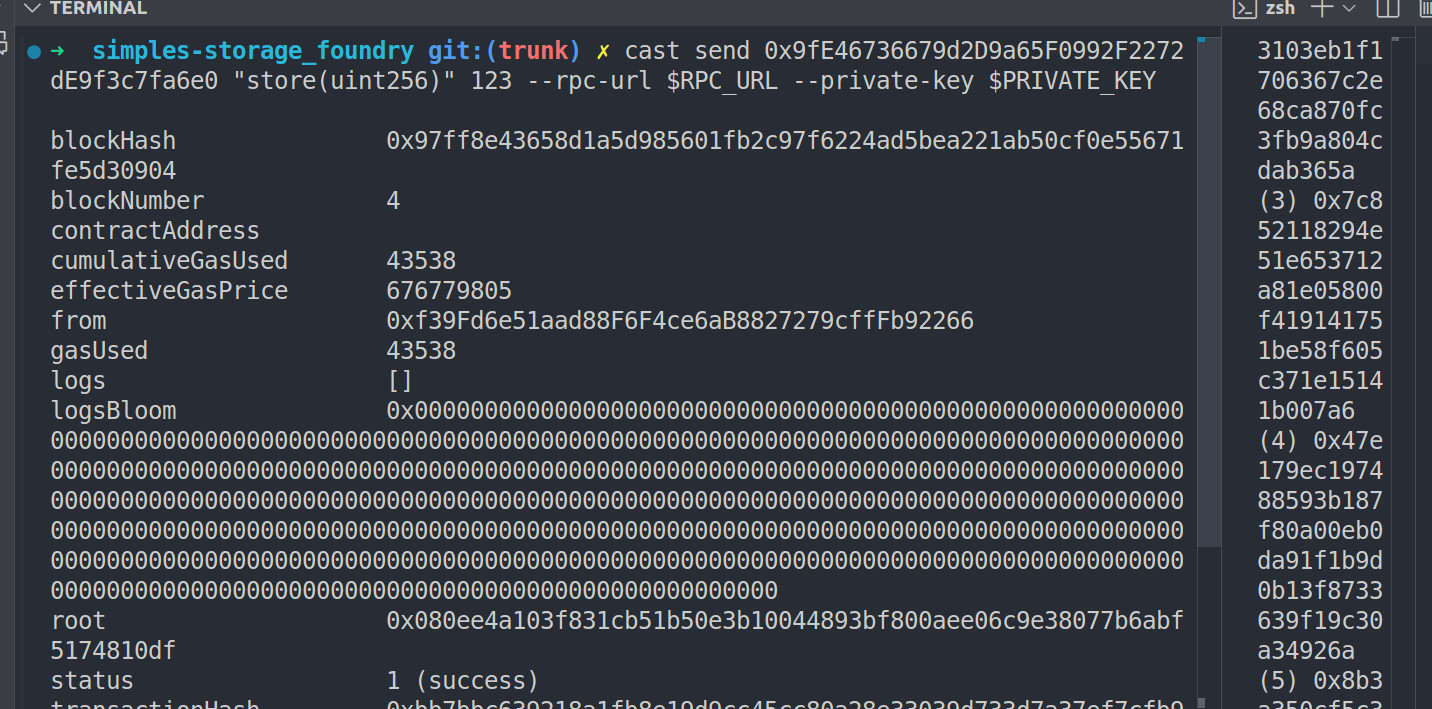
You’ll get a lot of data in there, go through them.
To read it, we can use cast call.
You know the drill? cast call --help.
Now let’s call a function:
cast call 0x9fE46736679d2D9a65F0992F2272dE9f3c7fa6e0 "retrieve()"

We can convert it to decimal to read it.

Deploying smart contract on testnet sepolia
Before, you should pack your private key along with you, we will use it here too.
You need to have an rpc url, head over to the alchemy dashboard, create an account, and after you’re done, you then create an app. If you’ve never used alchemy before, it is like our AWS in the web2 space, it provides a lot for developers and much more. To learn more about it, check here - an introduction to alchemy - a web3 development platform.
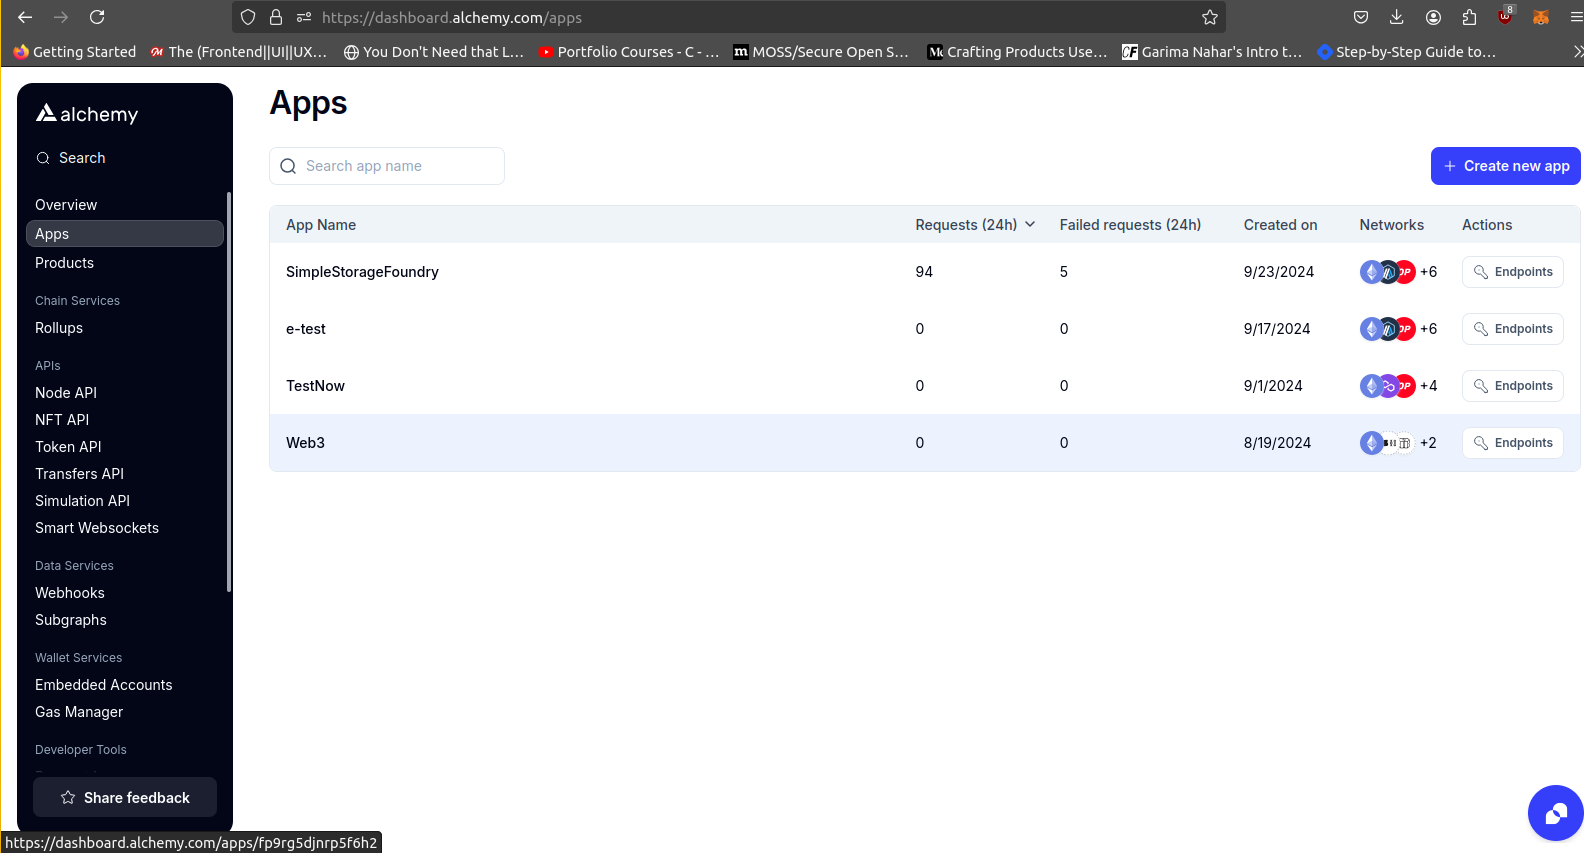
Down below you can change the toggle to ‘sepolia’ as shown below.
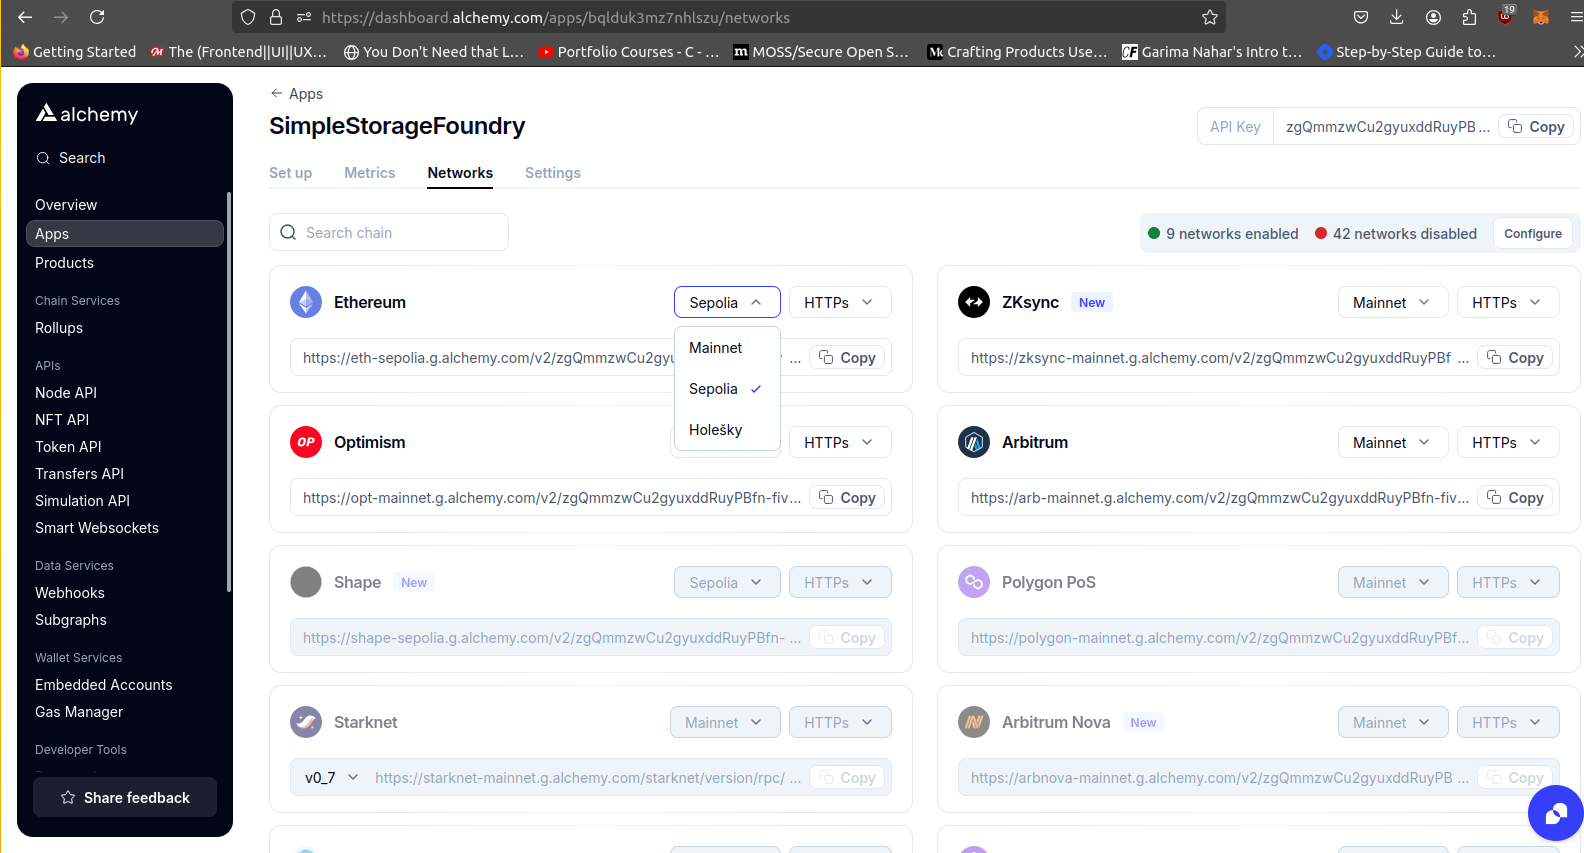
You need to have a sepolia rpc url and a private key (your real private keys here, you can get it from your wallet).
Then copy this one here, that is your rpc url.

Command to run is:
forge script script/DeploySimpleStorage.s.sol --rpc-url $SEPOLIA_RPC_URL --private-key $PRIVATE_KEY --broadcast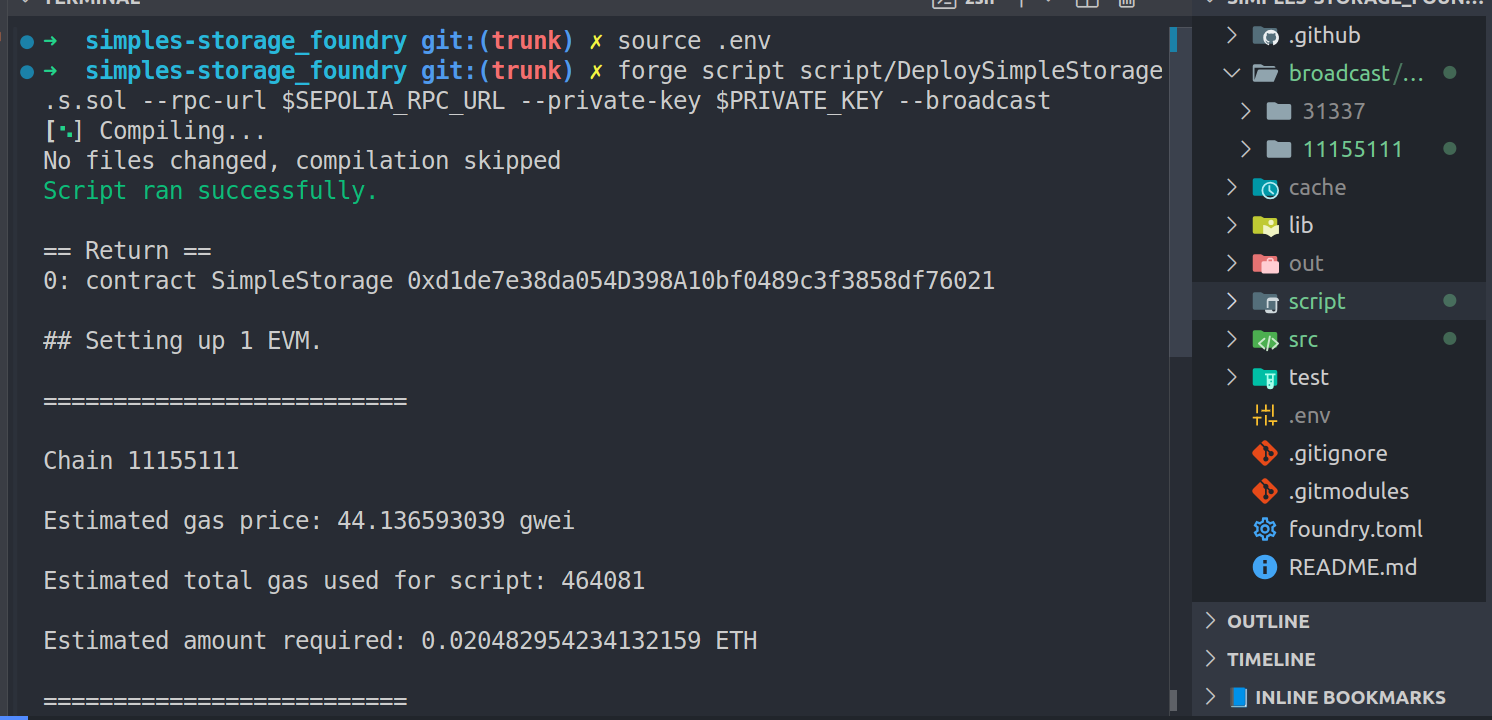
After successful deployment, you’d see some changes in the dashboard like this, it shouldn't be zeros. And also, the balance on your wallet would drop.
Sidechat
forge fmt- to format the code.
Zksync - Layer 2
Follow this guide to learn more, I wont make it long at the moment, but later I will update on the manual process of setting up the zksync development environment. But this is just an overview, and some adjustments you have to make while installing them locally.
installations
First step
git clone https://github.com/matter-labs/foundry-zksyncsecond step, cd foundry-zksync
finally ./install-foundry-zksync
To spin it: foundryup-zksync
guide
You can find the installation guide here for more.
Switching
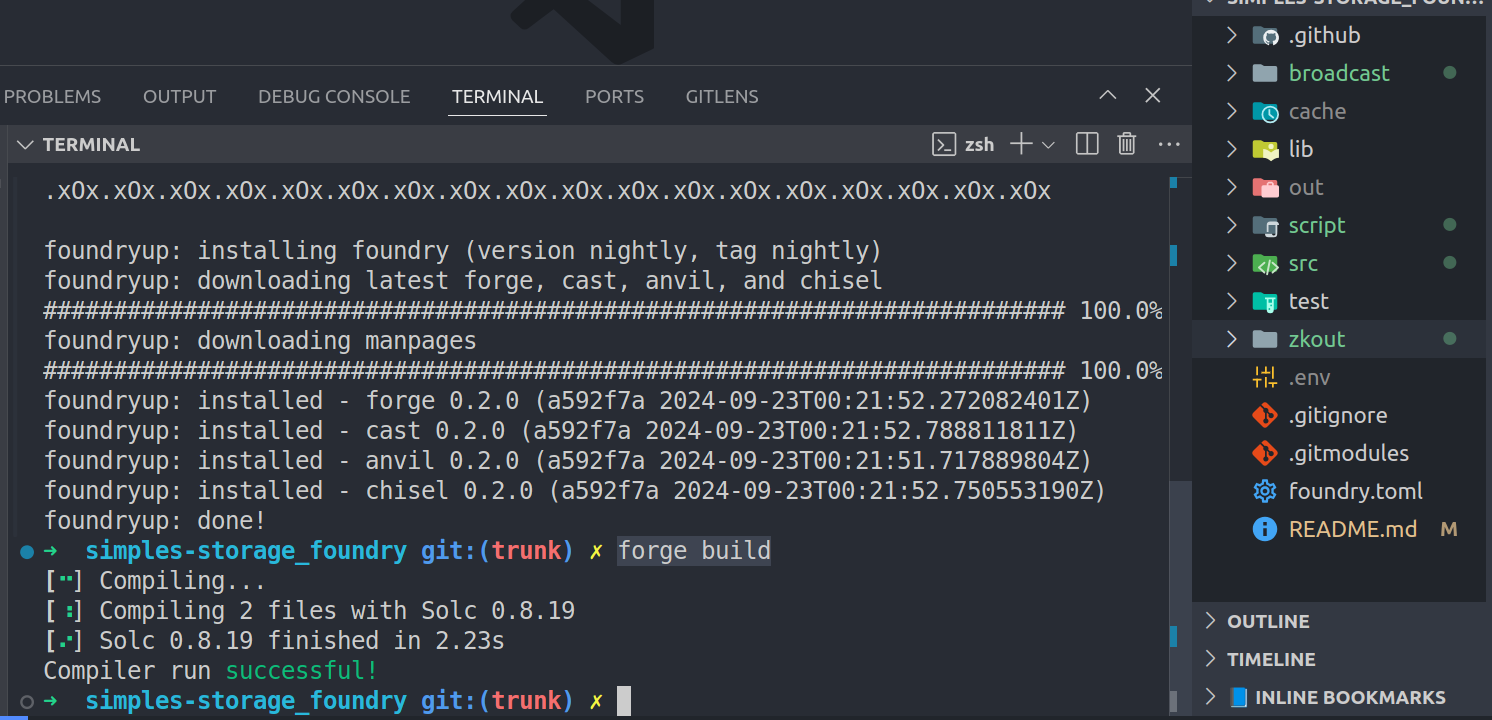
To go back to normal vanilla foundry - run foundryup - it will override forge and cast back to vanilla foundry, and switching back to zksync run foundryup-sksync.
To check, run forge build --help, you won't see any zksync flags anywhere. Run foundryup-sksync to see them back.
Compiling on zksync
Run the command below:
forge build --zksync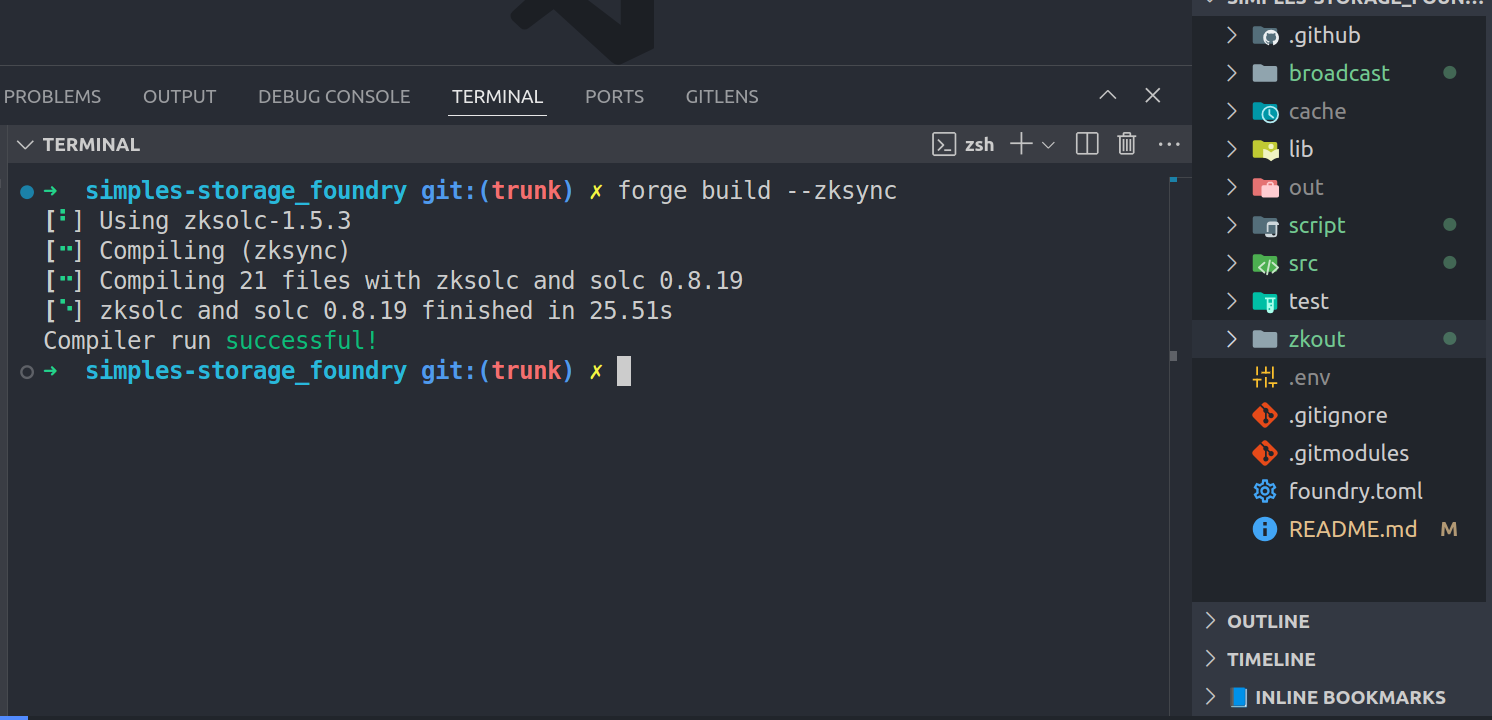
Compiling with the normal node, we will get our output on the out folder, while with zksync, we can have it in the zkout folder as shown above.
Deploying to zksync - locally
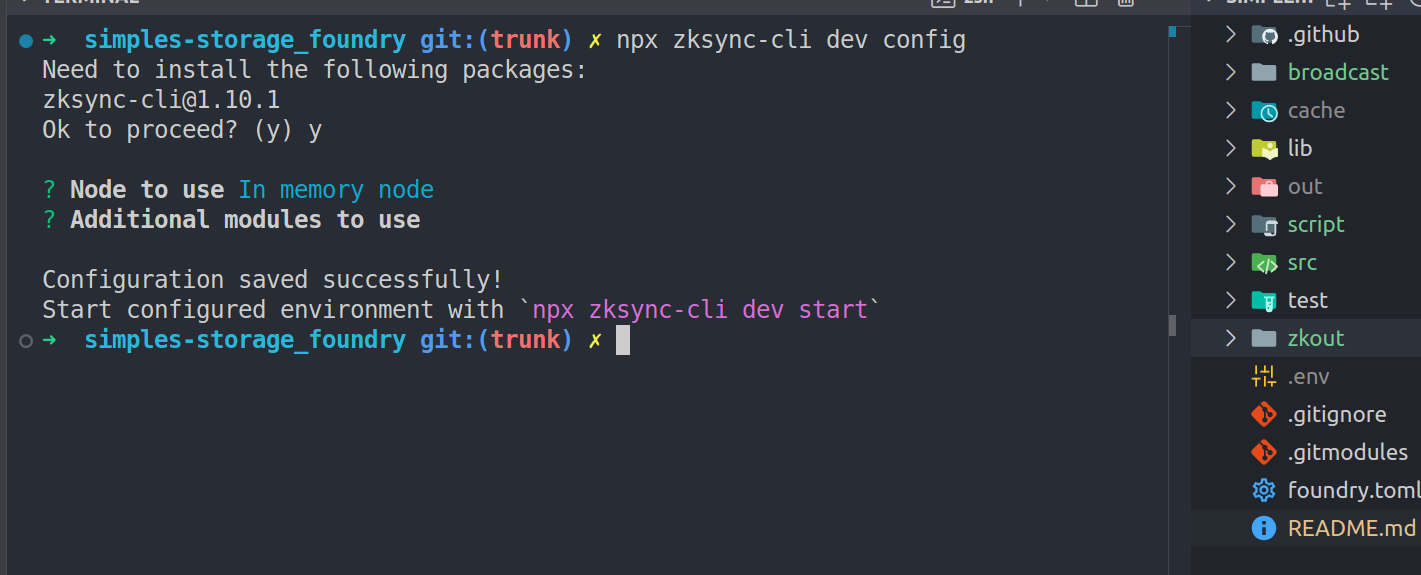
To work with zkzync – npx zksync-cli dev config.
You will be prompted to answer a few questions, but all depends with your choice, for now you can accept all as shown in the image below.
And to spin up our node, run the above npx zksync-cli dev start, it will run in the background, as opposed to anvil which we saw on the terminal.
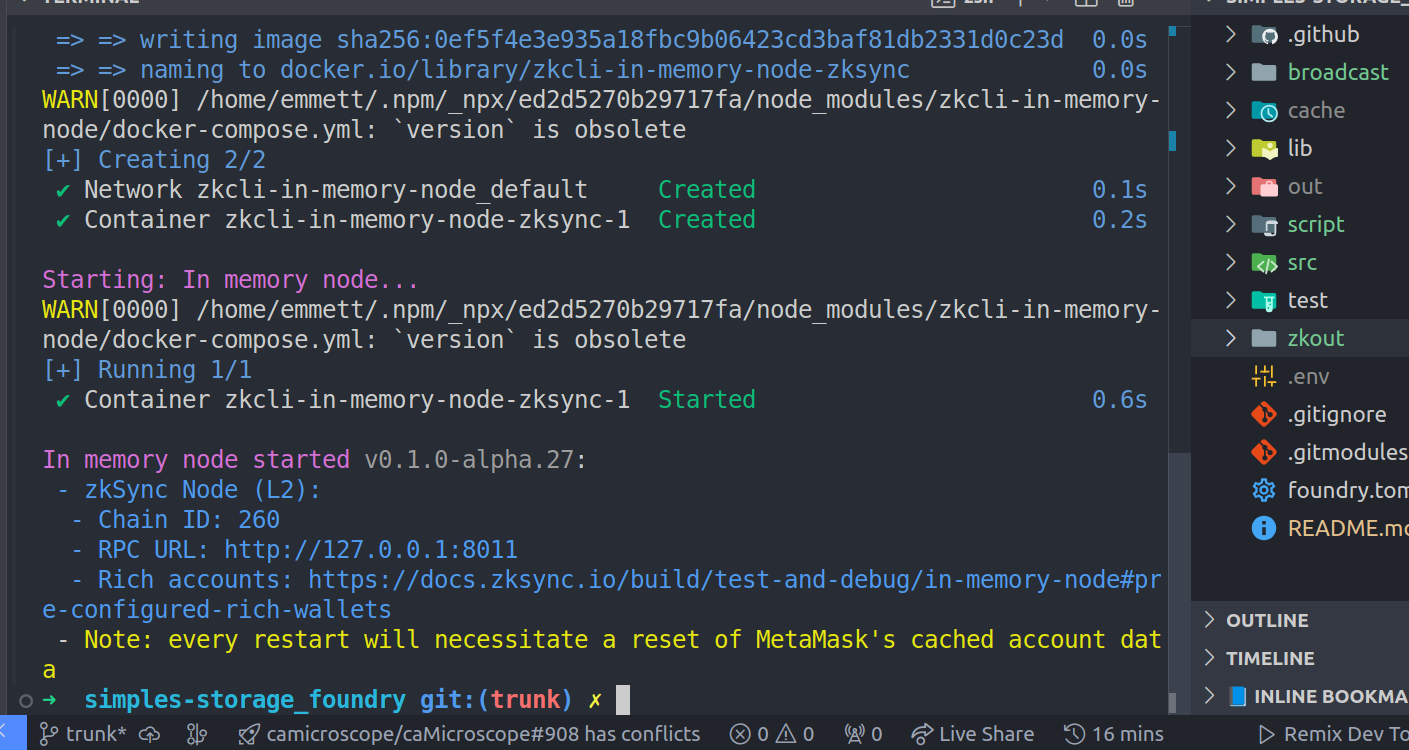
In the memory node - you can see we have chain id, rpc url and rich amounts, which we can paste on the internet and see some account private keys that we can use for testing.
To check if the node has started, you can run docker ps.

And on our docker we can see it running.
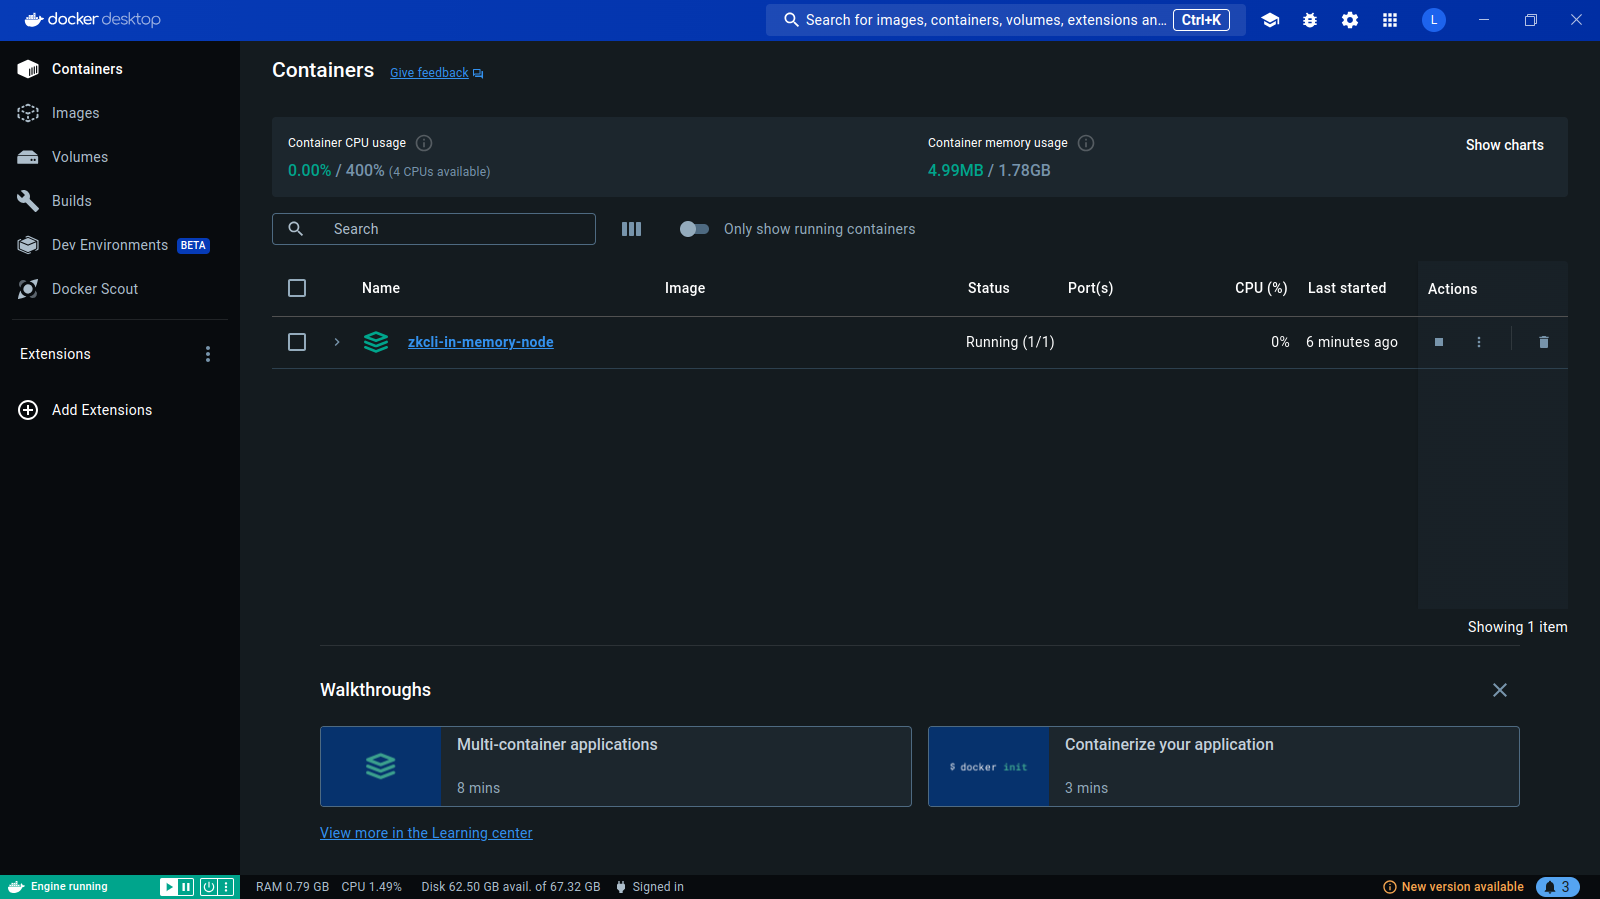
Quick note on the docker:
To start docker - sudo systemctl start docker, and to stop - sudo systemctl stop docker.
Now it's time we deploy to our local zksync chain, the same way we did with anvil.
You can run
forge create SimpleStorage --rpc-url http://127.0.0.1:8011 --private-key 0x3d3cbc973389cb26f657686445bcc75662b415b656078503592ac8c1abb8810e --legacy --zksyncif this doesnt work it because it may not find where the simple storage contract is, you can specify it this way
bash …src/SimpleStorage.sol:SimpleStorage …
you can think of … in the command above as the rest of the command.

Note, that is not my private key, you can have it from here from the docs for testing. Also, it is optional to include –legacy, but with large smart contract might be needed, but you won't miss the –zksync flag.
And that’s it for deploying zksync, to the local node.
Lisk sepolia deployment
Another layer 2, Lisk. We will run the command below to deploy.
To deploy to the lisk sepolia network please refer more to this docs for more info.
The command:
forge create src/SimpleStorage.sol:SimpleStorage --rpc-url $SEPOLIA_RPC_URL --etherscan-api-key 123 --private-key $PRIVATE_KEY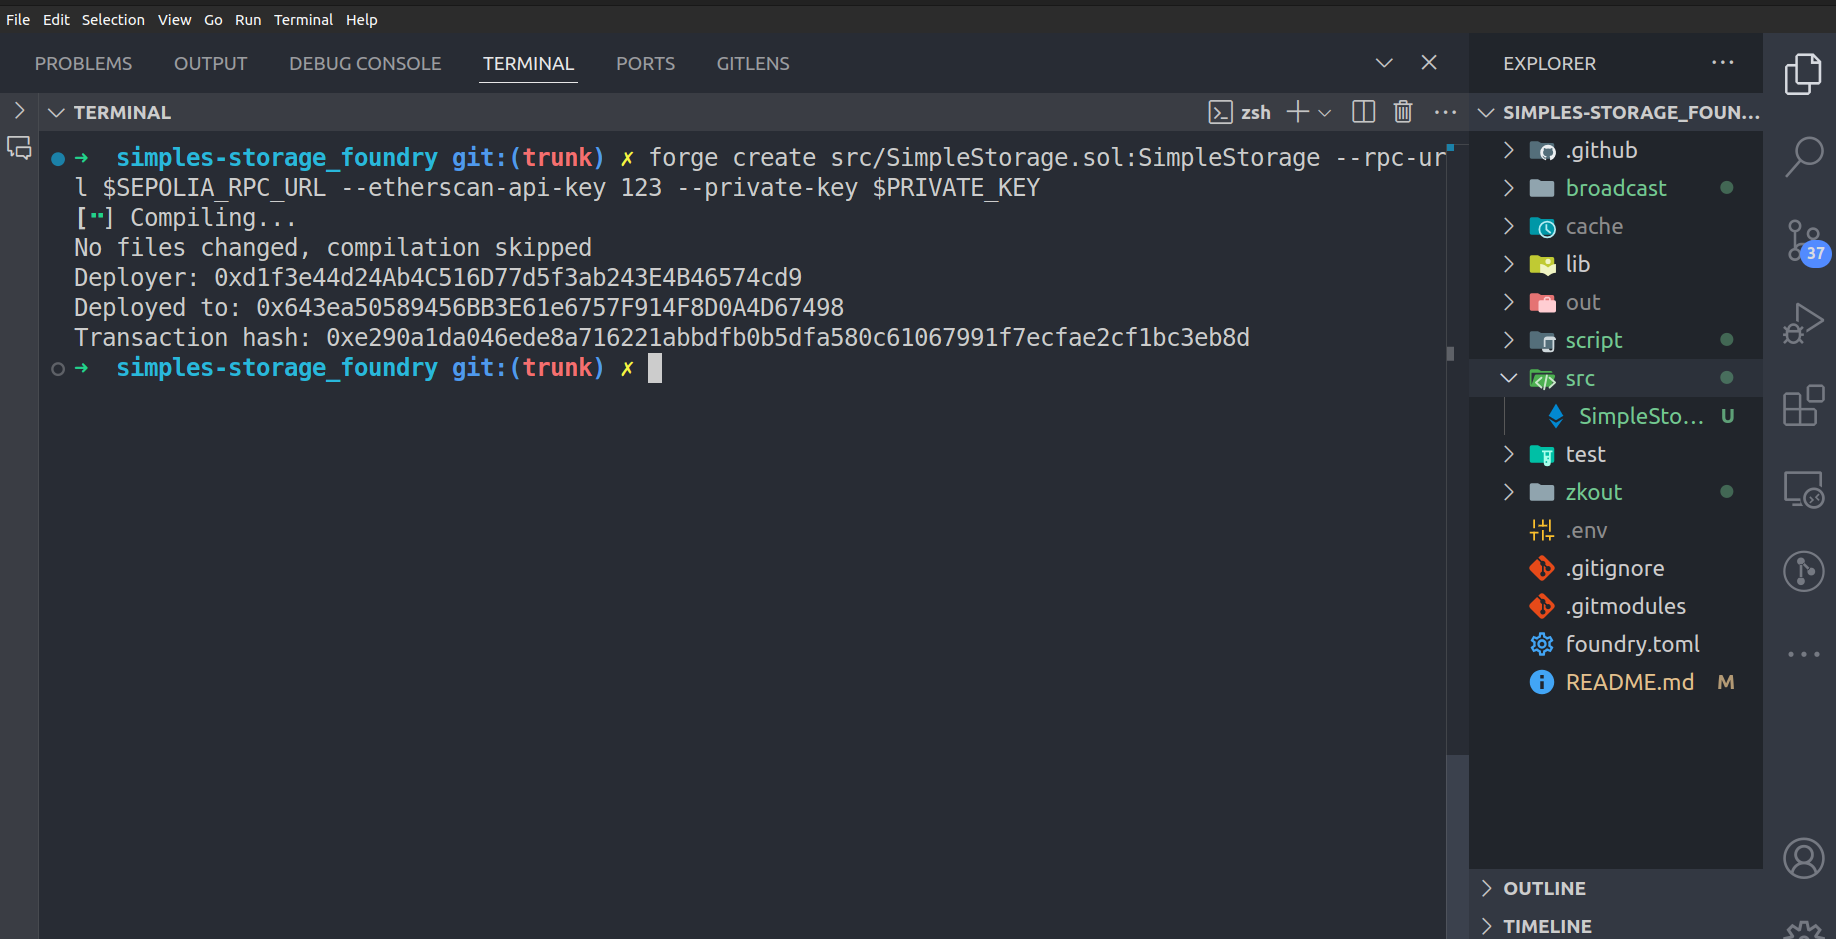
To view it on sepolia etherscan, here is the link.
Complete code snippet
You can find all the code here for practice if you need to follow along.
Wrap up
Yaay!! You’ve done an awesome job, I hope you got all you needed in this guide, and please feel free to reach out to me for any help. Deployment made easy now yeah? See yah!